How to assign an Elastic IP to EC2 instance
In our previous articles we learned how to create and launch and AWS EC2 instance and how we can connect it from your computer using the SSH protocol like PuTTY. But the problem is, every time you stop your EC2 instance and start it again, public IP of your instance changes. Now imagine if you are hosting your application on EC2 and the public IP changes. What is gonna happen? So one of the simplest solution is to attach an Elastic IP to your instance. So, in this tutorial, we are going to learn how to assign Elastic IP to your EC2 instance. You can watch the video tutorial for this tutorial from here
Prerequisites
* You need an Amazon Web Services Account.
* You need a created & launched EC2 instance to connect to. Instructions for this section can found in here.
Create an Elsatic IP Address
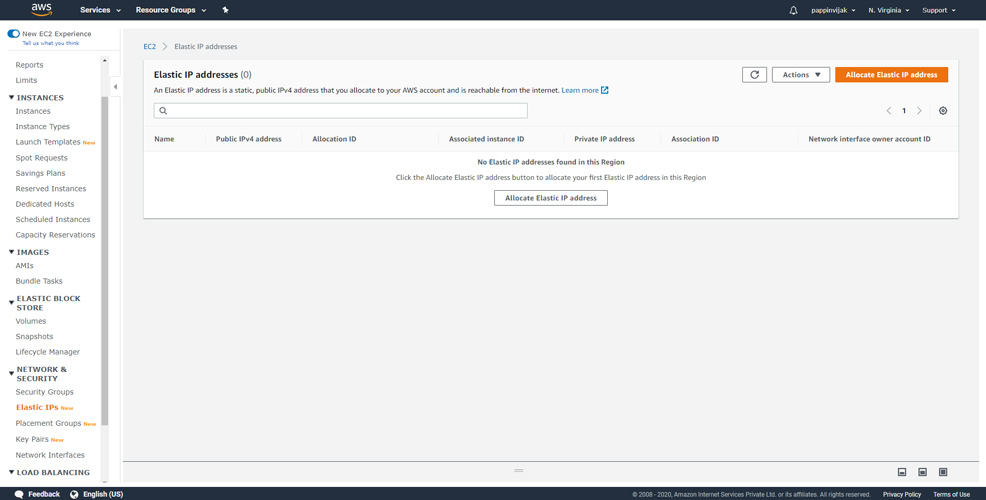
Login to your AWS management console and navigate to Compute -> EC2 and under Network and security click Elastic IPs.
In this screen click Allocate Elastic IP address.
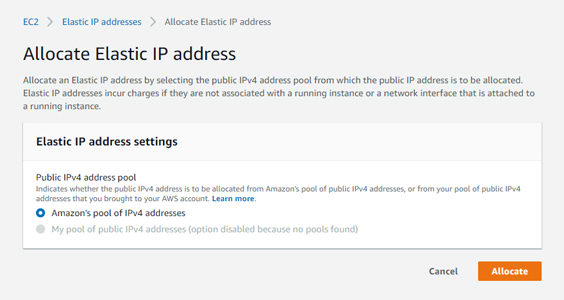
Now a new IPv4 address will get allocated.
Associate Elastic IP address
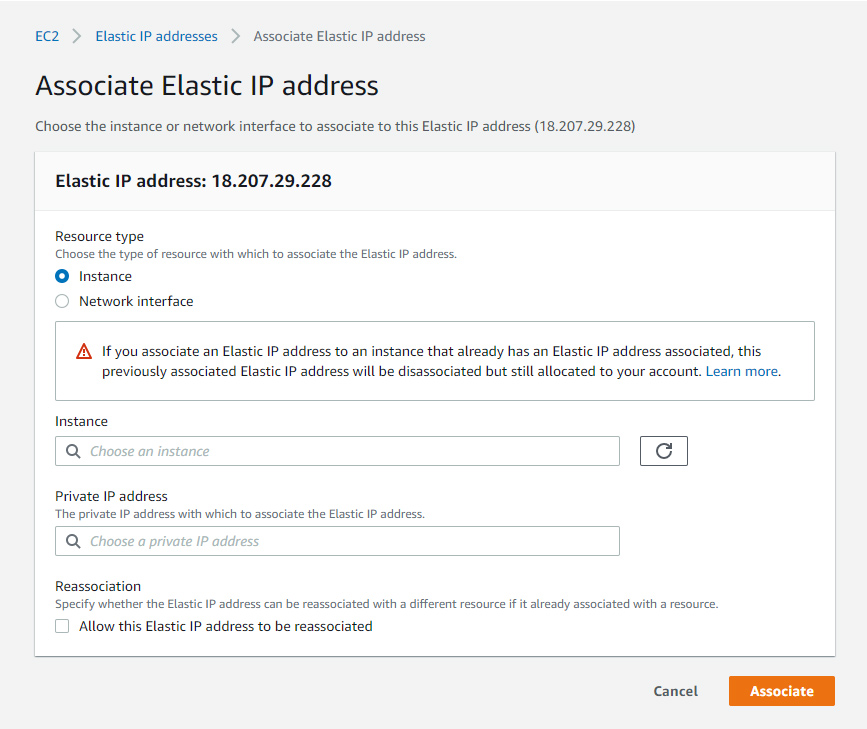
Once an IP is allocated you need to associate it with the EC2 Instance. To do so check the checkbox of your IP address and click Actions and choose Associate Elastic IP address. In the Resource type choose Instance and and choose the instance from the dropdown on the Instance field. If you have any other Elastic IP address assigned before and you need to re-associate you can enable the checkbox in Reassociation. Click Associate.
Release Elastic IP address
If you wish to no longer use the allocated IP address you can release it to prevent any unnecessary billings. To do so check the checkbox of your IP address and click Actions and choose Release Elastic IP address.
Conclusion
In this tutorial, we learn how to attach an Elastic IP to your EC2 instance. If you have any issue regarding this tutorial, mention your issue in comment section or reach me through my E-mail.
You can watch the video tutorial for this tutorial from here