How to connect to AWS EC2 instance using PuTTY
When you have created and launched and AWS EC2 instance and now you need to connect it from your computer using the SSH protocol, PuTTY is a free SSH client that allows you to do this from local computer running Windows. Once the connection has been established, you can work with EC2 instance like you would on a local computer running Linux. So, in this tutorial, we are going to learn how to connect EC2 instance using PuTTY. You can find the video tutorial for this tutorial from here.
Prerequisites
* You need an Amazon Web Services Account.
* You need a created & launched EC2 instance to connect to. Instructions for this is can found in here.
Download and install PuTTY
To connect to EC2 instance, you need PuTTY. So if you are not installed PuTTY yet, you can download PuTTY form here. After download it, then install it. By default it installed to path (C:> Program Files > PuTTY)
Genearte a PuTTY Private Key (.ppk) file
Now, open PuTTYgen Key Generator,
- click the Load button and navigate to the folder that contains the private key files(.pem) created during the EC2 configuration process.

Click on the PuTTY Private Key Files button in the lower-right corner of the window and select All Files(.)
Then select your private key file (.pem) and click Open.
Click OK to close the PuTTYgen Notice pop-up window.
In PuTTY Key Generator, make sure Type of key to generate value is set to RSA.
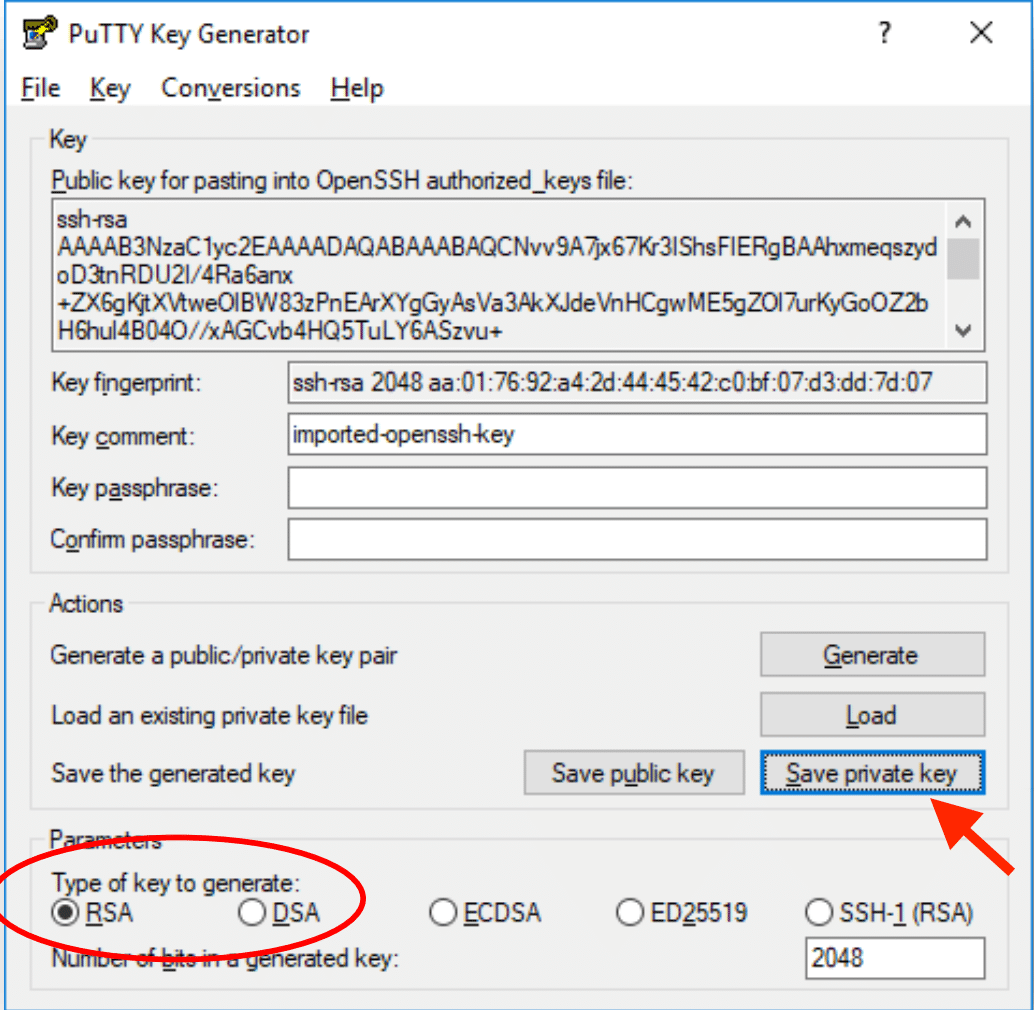
Click Save private key and then Yes to close the PuTTYgen Warning pop-up.
Finally, navigate to the location you want to store your PuTTY Private Key file (.ppk) and give it a name then Save it and close the PuTTY Key Generator window.
Click on the PuTTY Private Key Files button in the lower-right corner of the window and select All Files(.)
Then select your private key file (.pem) and click Open.
Click OK to close the PuTTYgen Notice pop-up window.
In PuTTY Key Generator, make sure Type of key to generate value is set to RSA.
Click Save private key and then Yes to close the PuTTYgen Warning pop-up.
Finally, navigate to the location you want to store your PuTTY Private Key file (.ppk) and give it a name then Save it and close the PuTTY Key Generator window.
Now we have finished the creation of our Private Key.
Connect to EC2 Instance
Now you need to open PuTTY.
- In the Host Name box, type your “ubuntu@your_public_DNS”
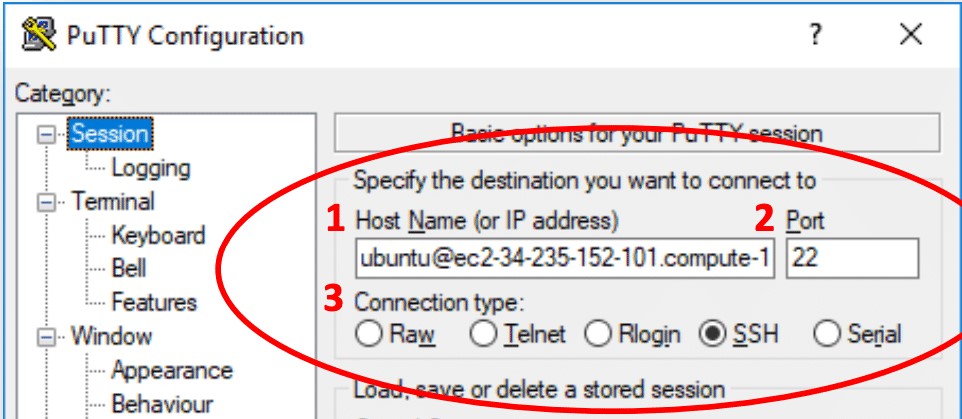
Make sure:
- Port is set to 22 (2).
- Connection type is SSH (3).
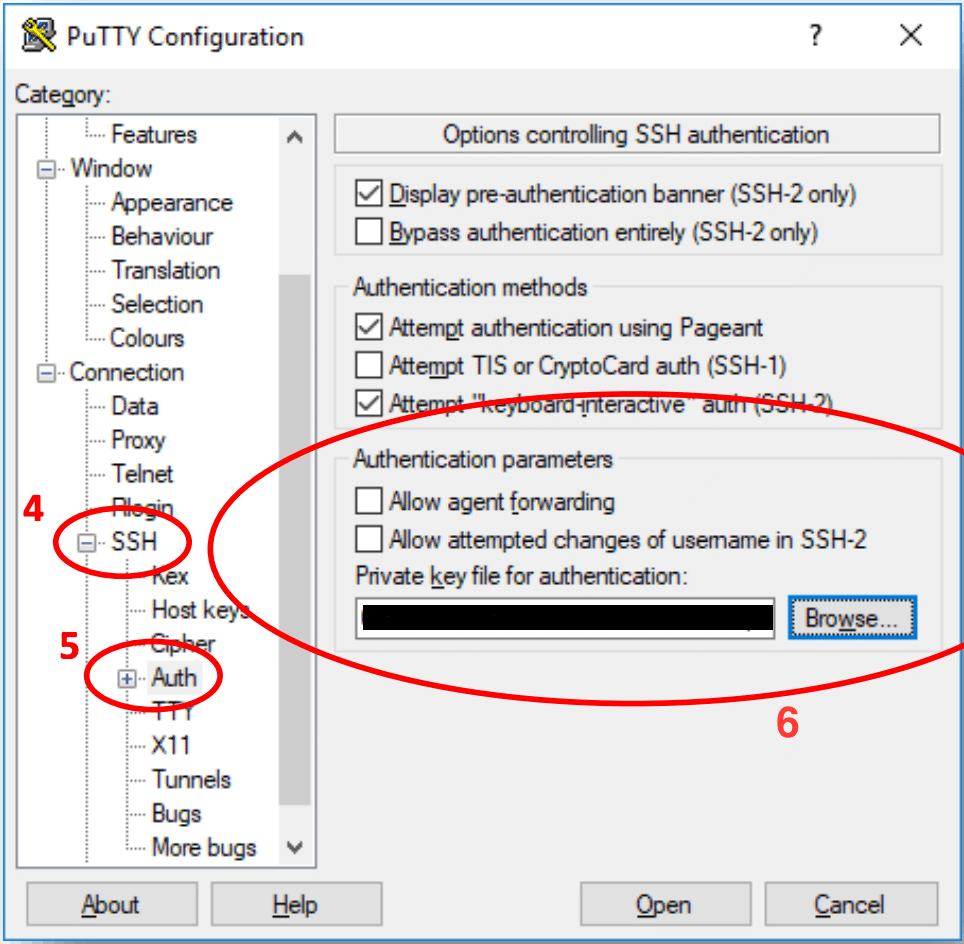
In the Category pane on the left of the PuTTY Configuration window, under Connection, click on the + next to SSH to expand the choices (4), then click on Auth (5).
Under Authentication parameters, click Browse and navigate to the directory where your PuTTY Private Key (.ppk) file is located (6).
- Click on the (.ppk) file to select it.
Click Open.
Make sure:
- Port is set to 22 (2).
- Connection type is SSH (3).
In the Category pane on the left of the PuTTY Configuration window, under Connection, click on the + next to SSH to expand the choices (4), then click on Auth (5).
Under Authentication parameters, click Browse and navigate to the directory where your PuTTY Private Key (.ppk) file is located (6).
- Click on the (.ppk) file to select it.
Click Open.
Note:
If you want to save these settings to use later, navigate to Sessions in the PuTTY Category tree. Enter a name in the Saved Sessions box and click Save on the right.Click Open in PuTTY Configuration to connect to your Instance.
If this is the first time you have connected to your Instance, a PuTTY Security Alert will ask you whether to proceed with the connection.
Click Yes to complete the connection.
The EC2 Instance window will appear (black screen below).


