How to host static website on Google firebase for free
In this article I am going to explain how to host a static website on Firebase for free. Firebase web hosting service is a fast, reliable and secure web serives and it allows you to host Static & Dynamic websites. When you use Firebase you don't want to pay extra for getting SSL certificate to secure your website with https and by default it gives your project a subdomain on the firebaseapp.com domain but you can use your own custom domain over the default domain which is given by Firebase hosting. In there free plan they provide 1GB storage which is sufficient for smaller websites.
Prerequisites
* Google Account
Before Starting make sure that you have gmail account. If not, you can simply obtain a google account here.
* Firebase-CLI
You can install the Firebase-CLI using npm (Node Package Manager) by running following command
npm install -g firebase-tools
It allows you to to administer Firebase projects from the command-line of a terminal and allows you to perform tasks like Realtime Database management tasks from the command-line of a terminal.
In case of you are not configured Node.js on your computer,
(A) Install Node.js
Go to nodejs.org and download latest version in it. There is no need to learn anything except downloading and installing.
(B) Verify NodeJs installed or not:
To verify Nodejs is installed or not, just type node -v in cmd and that will give you the version number.
Step 1: Creating Firebase project
Go to firebase
and sign in with your Google account by giving required credentials.
Then create new project using Add project section on it. ( In my case project name is demo-web )

Step 2: Firebase Login
By using your command line navigate to your project directory
cd firebase-demo
Now you have to log in to your Firebase by type following command on your command line.
firebase login
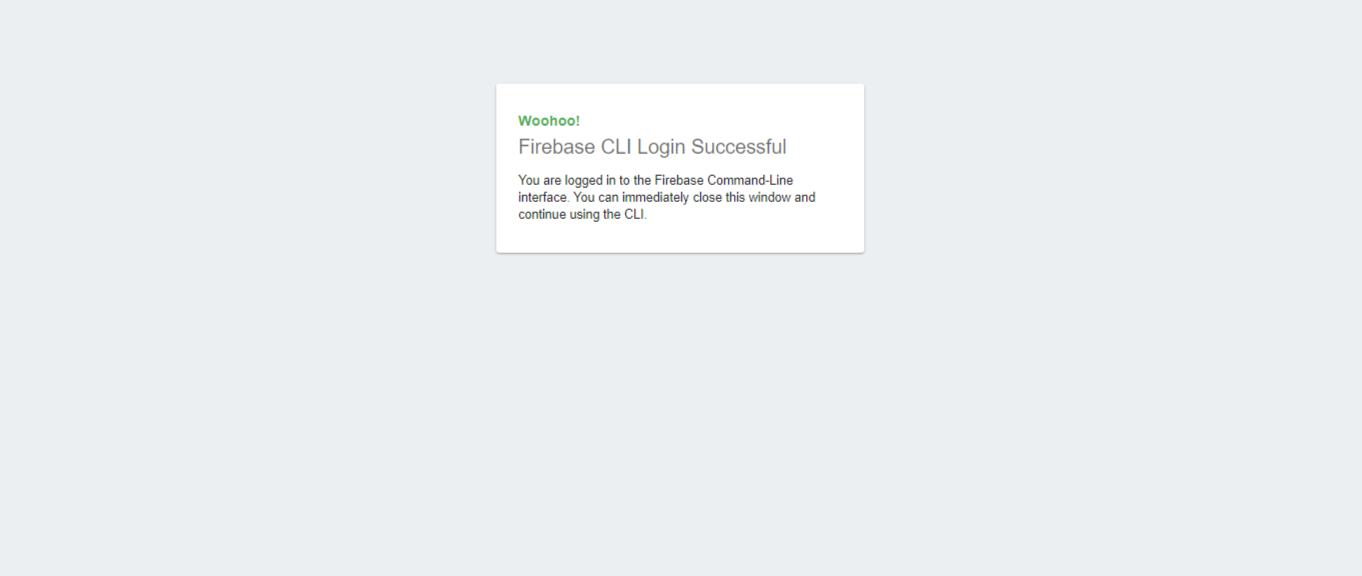
Then it will redirect you in to the sign-in page in the browser,
once you’ve successfully logged in it will show you something like this
Step 3: Initializing project
After authorizing your Google account with Firebase CLI, you need to initialize Firebase in the project root directory. To initialize the Firebase type following command in your command line.
firebase init
After running the above command, CLI ask you to select the ‘Hosting’ option, you can select a "Hosting option" by navigating using arrow and pressing the space key. After selecting ‘Hosting’ option, hit enter.
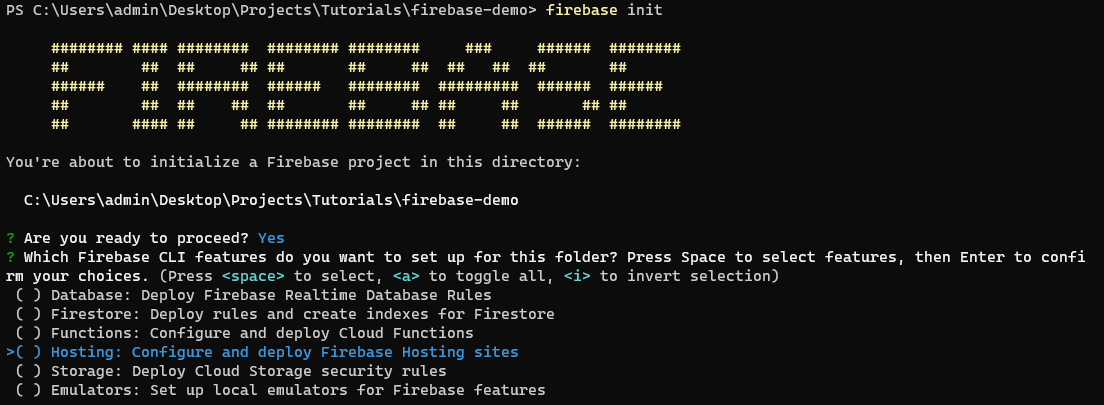 Then it will ask you to select firebase project type. We have already create our project on firebase. So select the "Use and existing project" from menu and hit enter.
 After that select the project which we have created before ( In my case demo-web )
 Then it will ask you to enter the main folder which all your website assets are present. (in my case public folder)
It will ask you whether your application is single page or not, for now enter "y".
If your sourcode code already place in your project directory, It will try to override your index.html file, to avoid doing that enter "n",
In case of still you are not start to code on your project press y. After this you will see Firebase created some files and directory . Now open public/index.html and modify it according to you.
Step 4: Checking setup
If you want to test the project locally before deployment run the serve command as follows:
firebase serve
And it’ll give you a local server link( It will run you website locally on http://localhost:5000 by default ) and if you click ctrl+click on the link, your website is open in the browser.
Step 5: Deployment
Now you have initialized and test your website locally and it’s time to deploy your website on the Firebase server.For deployment of your project you have to run command,
firebase deploy
Congratulations! your website is now live, you can check it by going to url which is provided in the command line.
Bonus Step: Rollback
Firebase maintains a history of all your deployment versions. You can even roll back to the older version also. Go to the Firebase Hosting page where you will find rollback option( You need to have more than one versions to rolloback). By doing a rollback to the versions, you can switch between each version of your website directly. It’s simple and helpful during the design and development stage.
All articles on this blog are licensed under CC BY-NC-SA 4.0 unless otherwise stated.
Comments
GitalkDisqus

